Tutorial - Setup EC2 Instance, Connect and Transfer Files
Amazon Elastic Compute Cloud (EC2) allows users to procure virtual servers to run their software applications. It’s part of the Amazon Web Services (AWS) cloud computing platform. Users can create, launch, connect, transfer files and terminate virtual servers on demand. In this tutorial, we’ll learn how to setup a new EC2 instance, connect to it, and transfer files to and from.
In this chapter
Setup a new EC2 Instance
Go to Amazon Web Services in a web browser. Select ‘My Account/Console’ menu option ‘AWS Management Console.”
Log in with your username & password. If you are new to Amazon then select ‘I am a new user.’ and create an account (NOTE: You do need a credit card, but there is a free tier of usage).
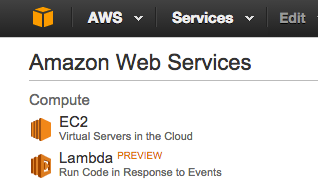
Click on EC2 (towards the upper left of the page).
Step 0: Launch new Instance
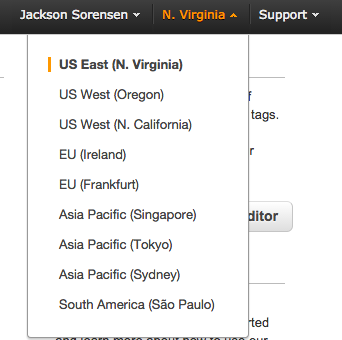
In the top right of the page between your login name and ‘Help’ there’s a drop down menu with regions. Select ‘US East (N. Virginia)’.
Click on the blue “Launch Instance” button (midway down the page)
Step 1: AMI
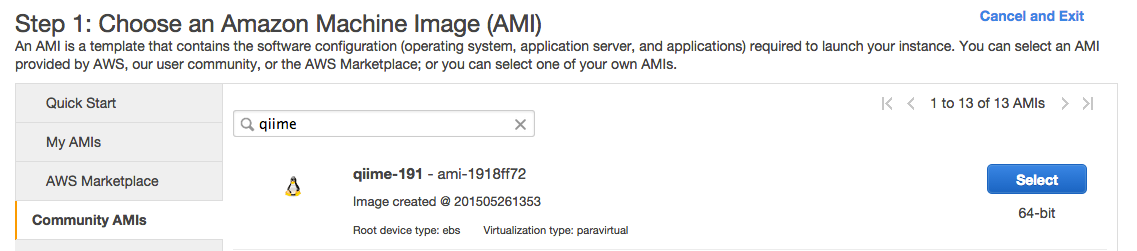
First we need to select an AMI. An AMI is essentially an operating system that you’ll run on your virtual server. You can choose “Amazon Linux 2” AMI which is Linux based and provides ongoing security and maintenance updates. You can also use communicated supported AMIs. For example, to use an AMI maintained by the QIIME developers. Searching for “qiime” under the community AMIs will show the QIIME developers’ AMI.
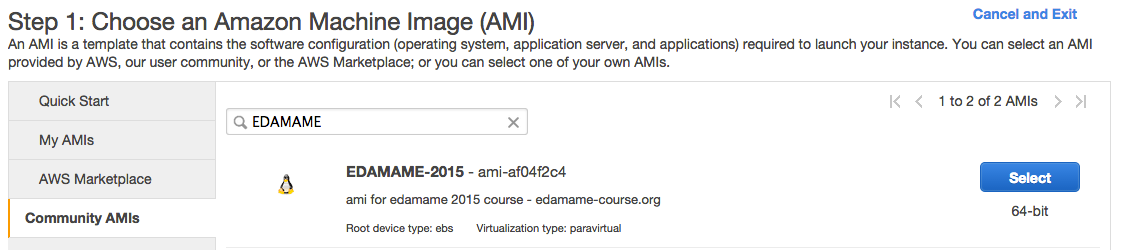
Later in the course we will use a separate AMI for the purposes of our mgDNA analyses. You can find this AMI by searching “EDAMAME”
Step 2: Instance Type
Select the appropriate instance type. This depends on the size of the data you are working with.
For the purpose of this workshop we will choose m3.large
Select Next: Configure Instance Details
Step 3: Optional configuration
At this step you can change specific components of the instance.
For the purposes of this workshop we will not need to change any details.
Step 4: Add Storage
Set 100 Gb for this instance. If you have a particularly large data set, then you may want to request more data storage space.
For the purposes of this workshop, 100 Gb should be plenty of space for our data files.
Select Next: Tag Instance
Step 5: Tag your Server
As you become more adept at utilizing EC2 Instances, you may wish to create tags for them.
For the purposes of this workshop we will not need to create a tag of the instance.
Select Next: Configure Security Group
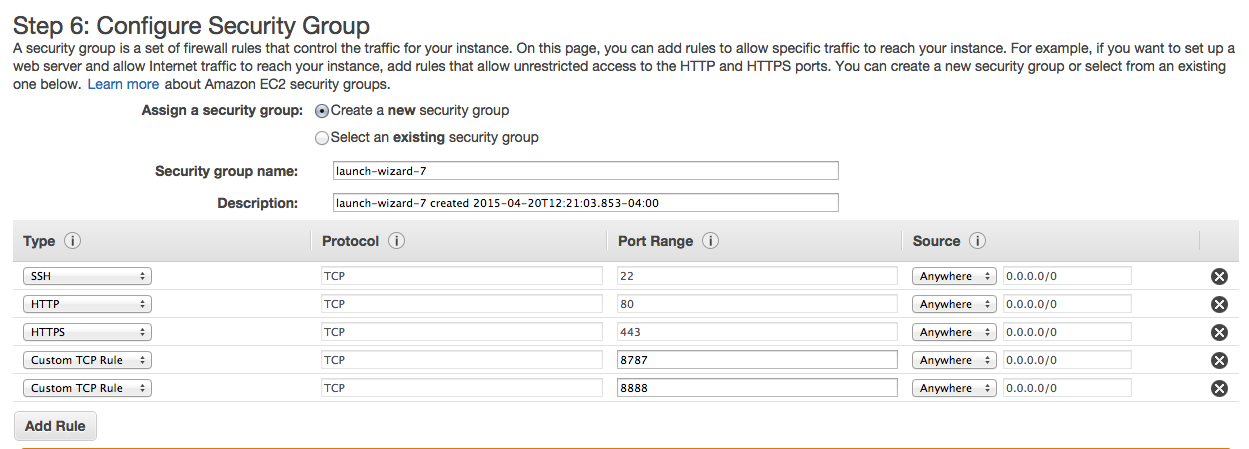
Step 6: Configure Security Groups
Here we will be making some changes.
-
Keep the default Security Group Name. Two independent users of the same AMI cannot have the same security group name, hence why we keep the default.
-
If you would like to give a description of the Security Group, then please feel free to do so at this time.
-
Next we will be adding some rules to the security group.
- Keep the existing ssh rule.
-
Click on Add Rule and select HTTP.
-
Click on Add Rule and select HTTPS.
-
Click on Add Rule and select Custom TCP Rule. Change the Port Range to 8787. Select Anywhere from the Source drop down menu.
- Click on Add Rule and select Custom TCP Rule. Change the Port Range to 8888 . Select Anywhere from the Source drop down menu.
The Security Group Configuration should look like the image below once you add the above rules.
Click on the blue Review and Launch button!
If you would like to, take the time to double check that everything is setup the way you intended.
Once you are sure that the EC2 Instance is set up the way you would like it to be set up, then click on the blue Launch button.
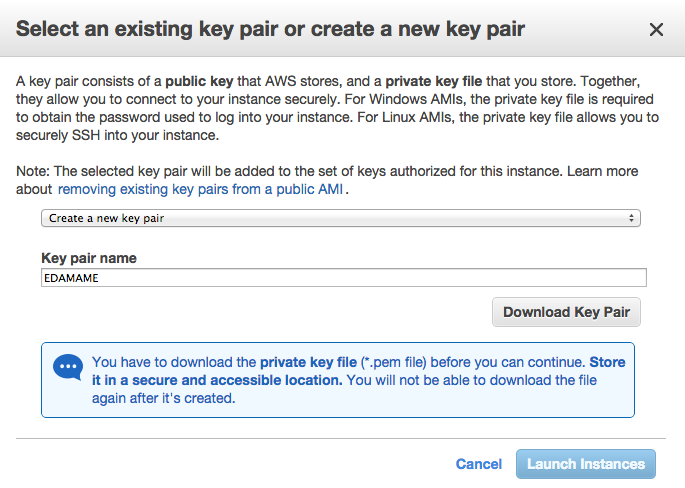
Key Pair Pop-up
If you already have a key pair and you wish to use it, then select Choose an existing key pair, pick your desired key, select the acknowledgement (making sure you have access to .pem file) and then click on the blue Launch Instances button.
If you do not have an existing key pair or you do not want to use one you already have, then select Create a new key pair. Give the key pair a name; the below example’s key pair’s name is “EDAMAME”.
-
Click on Download Key Pair and save it to a known location.
-
Click on the blue Launch Instances button.
At this point Amazon will give a warning saying that the EC2 instance you are starting is “open to the world”. This means that anyone is capable of accessing the instance so long as they have the public DNS and the specific key file. We are not concerned about this warning, mostly because each of us will have our own keyfile that no one else will. This means even if I had your public DNS for your EC2 instance I couldn’t login to it without you keyfile as well. If you want to have extra protection in the future, you can adjust the IP address ranges in the rules under the security group part of the EC2 setup to match your specific IP address. Keep in mind laptops will change IP addresses depending upon which network they are connected.
EC2 Dashboard - Instances
At this point you will be brought to your list of Instances on the EC2 Dashboard. The instance you just launched will have a yellow pending circle next to it. When the yellow cirle changes to a green circle, your instance is up and running. In the example below, there are two instances currently running. Select your instance by clicking on the box to the left and you will see its details appear in the pane below your list of instances.

Locate the Public DNS for your instance. It should look something like this:
ec2-**some set of numbers**.compute-1.amazonaws.com.
At some point you will need to highlight and copy the Public DNS. This is the link to your specific instance that you started at Amazon Web Services (AWS).
Connect and Transfer Files
In this section, we’ll learn how to:
- Use
sshto connect to a running Amazon EC2 instance - Use
scpto transfer files between a personal computer and the instance - Use
wgetto download data from external storage to an EC2 instance
Windows users: You can use MobaXterm here to use as your terminal.
Step 0. Find your EC2’s Public DNS:
Before you can connect to your EC2 instance you first need to find its Public DNS. This essentially acts as an address for your EC2 instance so that your local computer can access it. Go to AWS and sign into the Console. Select EC2, and then view your running instances. On this page, click on your instance and find it’s public DNS under the “Description” tab.
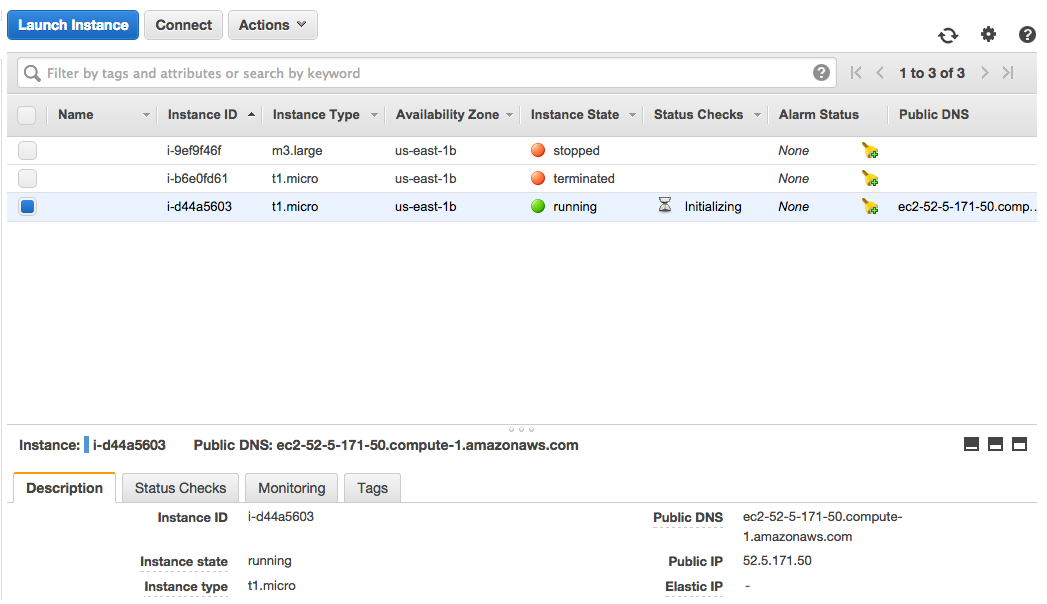
In the image above the full Public DNS of the highlighted instance is ec2-52-5-171-50.compute-1.amazonaws.com
Step 1. Change your keyfile permissions to read only
First, open your Terminal.
MAC Users: Terminal is under: Applications -> Utilities
Linux Users: Press Ctrl + Alt + t
You will need to know the location of your key pair you created when you launched your instance. Usually this will be in your “Downloads” folder, but you may want to move it elsewhere.
cd /Downloads
You will need to know what your Public DNS is for your EC2 Instance.
chmod 400 **/path/to/your/keyfile/**.pem
This command will adjust the permissions on your keyfile so that it cannot be edited. This is important because if the keyfile is edited or changed, it will no longer allow access to the EC2 instance.
Step 2. Connecting to your EC2 instance using ssh
ssh -i **/path/to/your/keyfile/**eda.pem ubuntu@"your public DNS"
On your first login, you may get a prompt stating that the host authenticity cannot be established, are you sure you want to continue? Yes, you really do.
SUCCESS! You have now logged into your computer in the cloud!
Step 3: After the first login
After the first login to the EC2, you do not need to repeat the chmod to change permissions for the key. Every time you start an previously-stopped EC2 instance, there will be a new Public DNS. To connect to the EC2 after the first login, copy and paste that new Public DNS in the corresponding place below:
ssh -i **/path/to/your/keyfile/**EDAMAME.pem ubuntu@"your public DNS"
Step 4: Transferring files to and from the EC2
Next we will go over how to copy a file from your personal computer to your EC2 instance using scp. The usage is very similar to ssh. Start a new terminal window before executing the command below.
scp -i **/path/to/your/keyfile.pem** **path/to/the/file/you/want/to/copy** ubuntu@"your public DNS":**/path/where/to /copy/the/file**
Just like with ssh we have to identify the keyfile using -i so that scp can connect to our EC2 instance. Then we specify two more arguments. First, we need to give the file path of the file we want to copy to our instance. Then, we specify where we are copying the file. We give the address of the instance with ubuntu@"yourpublicDNS" followed by the destination path using :"/path/where/to/copy/the/file". Below is an example of where I am copying a file from the Desktop on my Mac to my Amazon EC2 Instance. My keyfile is also located on the Desktop of my Mac.
scp -i /Users/JSorensen/Desktop/EDAMAME.pem /Users/JSorensen/Desktop/Centralia.fastq [email protected]:/home/ubuntu/
I am copying the file from the Desktop of my Mac to the directory /home/ubuntu/ on my EC2 instance.
If we want to copy a file from the EC2 instance to our personal computer we just switch the second and third arguments as follows.
scp -i "path to your keyfile.pem" ubuntu@"your public DNS":"path to the file you want to copy" "path where to save the file on your computer"
Here’s an example where I am copying the same file as before but I am copying back to my Desktop of my Mac from the EC2 instance. Note that I am running this command from my own local machine(ie I am not connected to the EC2 instance when running this)
scp -i /Users/JSorensen/Desktop/EDAMAME.pem [email protected]:/home/ubuntu/Centralia.fastq /Users/JSorensen/Desktop/
Now you have the tools to work with your EC2 instance!
LICENSE: Original content Workshop in microbial metagenome analysis at Michigan State University - EDAMAME Tutorials 2015. Edited add extra information and remove course specific notes. Used under CC-BY. This content is available under CC-BY-SA, WITHOUT WARRANTY OF ANY KIND and you follow it at your own risk.