Related Books


Books / The Little ASP.NET Core Book / Chapter 11
Using Databases
Writing database code can be tricky. Unless you really know what you’re doing, it’s a bad idea to paste raw SQL query strings into your application code. An object-relational mapper (ORM) makes it easier to write code that interacts with a database by adding a layer of abstraction between your code and the database itself. Hibernate in Java and ActiveRecord in Ruby are two well-known ORMs.
There are a number of ORMs for .NET, including one built by Microsoft and included in ASP.NET Core by default: Entity Framework Core. Entity Framework Core makes it easy to connect to a number of different database types, and lets you use C# code to create database queries that are mapped back into C# models (POCOs).
Remember how creating a service interface decoupled the controller code from the actual service class? Entity Framework Core is like a big interface over your database. Your C# code can stay database-agnostic, and you can swap out different providers depending on the underlying database technology.
Entity Framework Core can connect to relational databases like SQL Server, PostgreSQL, and MySQL, and also works with NoSQL (document) databases like Mongo. During development, you’ll use SQLite in this project to make things easy to set up.
Connect to a database
There are a few things you need to use Entity Framework Core to connect to a database. Since you used dotnet new and the MVC + Individual Auth template to set your project, you’ve already got them:
-
The Entity Framework Core packages. These are included by default in all ASP.NET Core projects.
-
A database (naturally). The
app.dbfile in the project root directory is a small SQLite database created for you bydotnet new. SQLite is a lightweight database engine that can run without requiring you to install any extra tools on your machine, so it’s easy and quick to use in development. -
A database context class. The database context is a C# class that provides an entry point into the database. It’s how your code will interact with the database to read and save items. A basic context class already exists in the
Data/ApplicationDbContext.csfile. -
A connection string. Whether you are connecting to a local file database (like SQLite) or a database hosted elsewhere, you’ll define a string that contains the name or address of the database to connect to. This is already set up for you in the
appsettings.jsonfile: the connection string for the SQLite database isDataSource=app.db.
Entity Framework Core uses the database context, together with the connection string, to establish a connection to the database. You need to tell Entity Framework Core which context, connection string, and database provider to use in the ConfigureServices method of the Startup class. Here’s what’s defined for you, thanks to the template:
services.AddDbContext<ApplicationDbContext>(options =>
    options.UseSqlite(
        Configuration.GetConnectionString("DefaultConnection")));
This code adds the ApplicationDbContext to the service container, and tells Entity Framework Core to use the SQLite database provider, with the connection string from configuration (appsettings.json).
As you can see, dotnet new creates a lot of stuff for you! The database is set up and ready to be used. However, it doesn’t have any tables for storing to-do items. In order to store your TodoItem entities, you’ll need to update the context and migrate the database.
Update the context
There’s not a whole lot going on in the database context yet:
Data/ApplicationDbContext.cs
public class ApplicationDbContext
             : IdentityDbContext<ApplicationUser>
{
    public ApplicationDbContext(
        DbContextOptions<ApplicationDbContext> options)
        : base(options)
    {
    }

    protected override void OnModelCreating(ModelBuilder builder)
    {
        base.OnModelCreating(builder);
        // ...
    }
}
Add a DbSet property to the ApplicationDbContext, right below the constructor:
public ApplicationDbContext(
    DbContextOptions<ApplicationDbContext> options)
    : base(options)
{
}

public DbSet<TodoItem> Items { get; set; }

// ...
A DbSet represents a table or collection in the database. By creating a DbSet<TodoItem> property called Items, you’re telling Entity Framework Core that you want to store TodoItem entities in a table called Items.
You’ve updated the context class, but now there’s one small problem: the context and database are now out of sync, because there isn’t actually an Items table in the database. (Just updating the code of the context class doesn’t change the database itself.)
In order to update the database to reflect the change you just made to the context, you need to create a migration.
If you already have an existing database, search the web for “scaffold-dbcontext existing database” and read Microsoft’s documentation on using the
Scaffold-DbContexttool to reverse-engineer your database structure into the properDbContextand model classes automatically.
Create a migration
Migrations keep track of changes to the database structure over time. They make it possible to undo (roll back) a set of changes, or create a second database with the same structure as the first. With migrations, you have a full history of modifications like adding or removing columns (and entire tables).
In the previous chapter, you added an Items set to the context. Since the context now includes a set (or table) that doesn’t exist in the database, you need to create a migration to update the database:
dotnet ef migrations add AddItems
This creates a new migration called AddItems by examining any changes you’ve made to the context.
If you get an error like
No executable found matching command "dotnet-ef", make sure you’re in the right directory. These commands must be run from the project root directory (where theProgram.csfile is).
If you open up the Data/Migrations directory, you’ll see a few files:
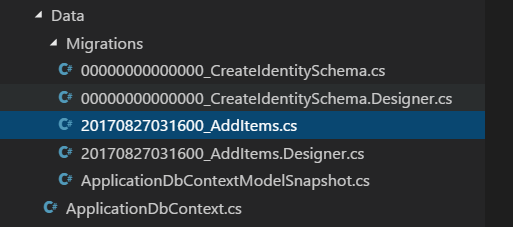
The first migration file (with a name like 00_CreateIdentitySchema.cs) was created and applied for you way back when you ran dotnet new. Your new AddItem migration is prefixed with a timestamp when you create it.
You can see a list of migrations with
dotnet ef migrations list.
If you open your migration file, you’ll see two methods called Up and Down:
**Data/Migrations/
protected override void Up(MigrationBuilder migrationBuilder)
{
    // (... some code)

    migrationBuilder.CreateTable(
        name: "Items",
        columns: table => new
        {
            Id = table.Column<Guid>(nullable: false),
            DueAt = table.Column<DateTimeOffset>(nullable: true),
            IsDone = table.Column<bool>(nullable: false),
            Title = table.Column<string>(nullable: true)
        },
        constraints: table =>
        {
            table.PrimaryKey("PK_Items", x => x.Id);
        });

    // (some code...)
}

protected override void Down(MigrationBuilder migrationBuilder)
{
    // (... some code)

    migrationBuilder.DropTable(
        name: "Items");

    // (some code...)
}
The Up method runs when you apply the migration to the database. Since you added a DbSet<TodoItem> to the database context, Entity Framework Core will create an Items table (with columns that match a TodoItem) when you apply the migration.
The Down method does the opposite: if you need to undo (roll back) the migration, the Items table will be dropped.
Workaround for SQLite limitations
There are some limitations of SQLite that get in the way if you try to run the migration as-is. Until this problem is fixed, use this workaround:
- Comment out or remove the
migrationBuilder.AddForeignKeylines in theUpmethod. - Comment out or remove any
migrationBuilder.DropForeignKeylines in theDownmethod.
If you use a full-fledged SQL database, like SQL Server or MySQL, this won’t be an issue and you won’t need to do this (admittedly hackish) workaround.
Apply the migration
The final step after creating one (or more) migrations is to actually apply them to the database:
dotnet ef database update
This command will cause Entity Framework Core to create the Items table in the database.
If you want to roll back the database, you can provide the name of the previous migration:
dotnet ef database update CreateIdentitySchemaThis will run theDownmethods of any migrations newer than the migration you specify.
If you need to completely erase the database and start over, run
dotnet ef database dropfollowed bydotnet ef database updateto re-scaffold the database and bring it up to the current migration.
That’s it! Both the database and the context are ready to go. Next, you’ll use the context in your service layer.
Create a new service class
Back in the MVC basics chapter, you created a FakeTodoItemService that contained hard-coded to-do items. Now that you have a database context, you can create a new service class that will use Entity Framework Core to get the real items from the database.
Delete the FakeTodoItemService.cs file, and create a new file:
Services/TodoItemService.cs
using System;
using System.Collections.Generic;
using System.Linq;
using System.Threading.Tasks;
using AspNetCoreTodo.Data;
using AspNetCoreTodo.Models;
using Microsoft.EntityFrameworkCore;

namespace AspNetCoreTodo.Services
{
    public class TodoItemService : ITodoItemService
    {
        private readonly ApplicationDbContext _context;

        public TodoItemService(ApplicationDbContext context)
        {
            _context = context;
        }

        public async Task<TodoItem[]> GetIncompleteItemsAsync()
        {
            var items = await _context.Items
                .Where(x => x.IsDone == false)
                .ToArrayAsync();
            return items;
        }
    }
}
You’ll notice the same dependency injection pattern here that you saw in the MVC basics chapter, except this time it’s the ApplicationDbContext that’s getting injected. The ApplicationDbContext is already being added to the service container in the ConfigureServices method, so it’s available for injection here.
Let’s take a closer look at the code of the GetIncompleteItemsAsync method. First, it uses the Items property of the context to access all the to-do items in the DbSet:
var items = await _context.Items
Then, the Where method is used to filter only the items that are not complete:
.Where(x => x.IsDone == false)
The Where method is a feature of C# called LINQ (language integrated query), which takes inspiration from functional programming and makes it easy to express database queries in code. Under the hood, Entity Framework Core translates the Where method into a statement like SELECT * FROM Items WHERE IsDone = 0, or an equivalent query document in a NoSQL database.
Finally, the ToArrayAsync method tells Entity Framework Core to get all the entities that matched the filter and return them as an array. The ToArrayAsync method is asynchronous (it returns a Task), so it must be awaited to get its value.
To make the method a little shorter, you can remove the intermediate items variable and just return the result of the query directly (which does the same thing):
public async Task<TodoItem[]> GetIncompleteItemsAsync()
{
    return await _context.Items
        .Where(x => x.IsDone == false)
        .ToArrayAsync();
}
Update the service container
Because you deleted the FakeTodoItemService class, you’ll need to update the line in ConfigureServices that is wiring up the ITodoItemService interface:
services.AddScoped<ITodoItemService, TodoItemService>();
AddScoped adds your service to the service container using the scoped lifecycle. This means that a new instance of the TodoItemService class will be created during each web request. This is required for service classes that interact with a database.
Adding a service class that interacts with Entity Framework Core (and your database) with the singleton lifecycle (or other lifecycles) can cause problems, because of how Entity Framework Core manages database connections per request under the hood. To avoid that, always use the scoped lifecycle for services that interact with Entity Framework Core.
The TodoController that depends on an injected ITodoItemService will be blissfully unaware of the change in services classes, but under the hood it’ll be using Entity Framework Core and talking to a real database!
Test it out
Start up the application and navigate to http://localhost:5000/todo. The fake items are gone, and your application is making real queries to the database. There doesn’t happen to be any saved to-do items, so it’s blank for now.
In the next chapter, you’ll add more features to the application, starting with the ability to create new to-do items.