
I’m a huge fan of retro video games and pixel art. Over the Christmas break, I tried (after a long hiatus) to create some pixel art for a retro-style 2D mobile game I was building in Unity for fun. I had to struggle a little in setting up Photoshop to create 2D sprites and the background, so here’s a quick step-by-step tutorial on how to configure Photoshop to create pixel art.
Step 1: Create a Tiny Image
Pixel art is done in very low resolutions. What this means is that you’ll start by creating a very small image, one that you can barely see without zooming in. I can’t give you a rule of thumb, but I generally use 20x20 pixels for sprites (sometimes 40x40 pixels if I want to put in more details) and about 150x80 pixels for backgrounds.
So go ahead and create a new image in Photoshop.
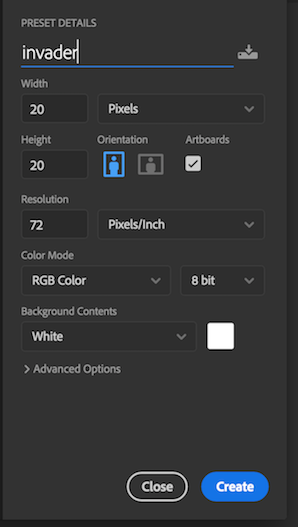
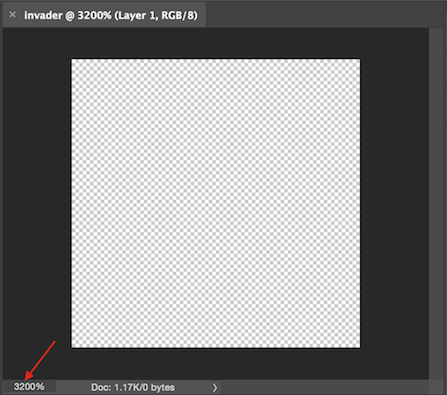
After you have created the image, you’ll be able to see it barely. So zoom in so you are able to see it.
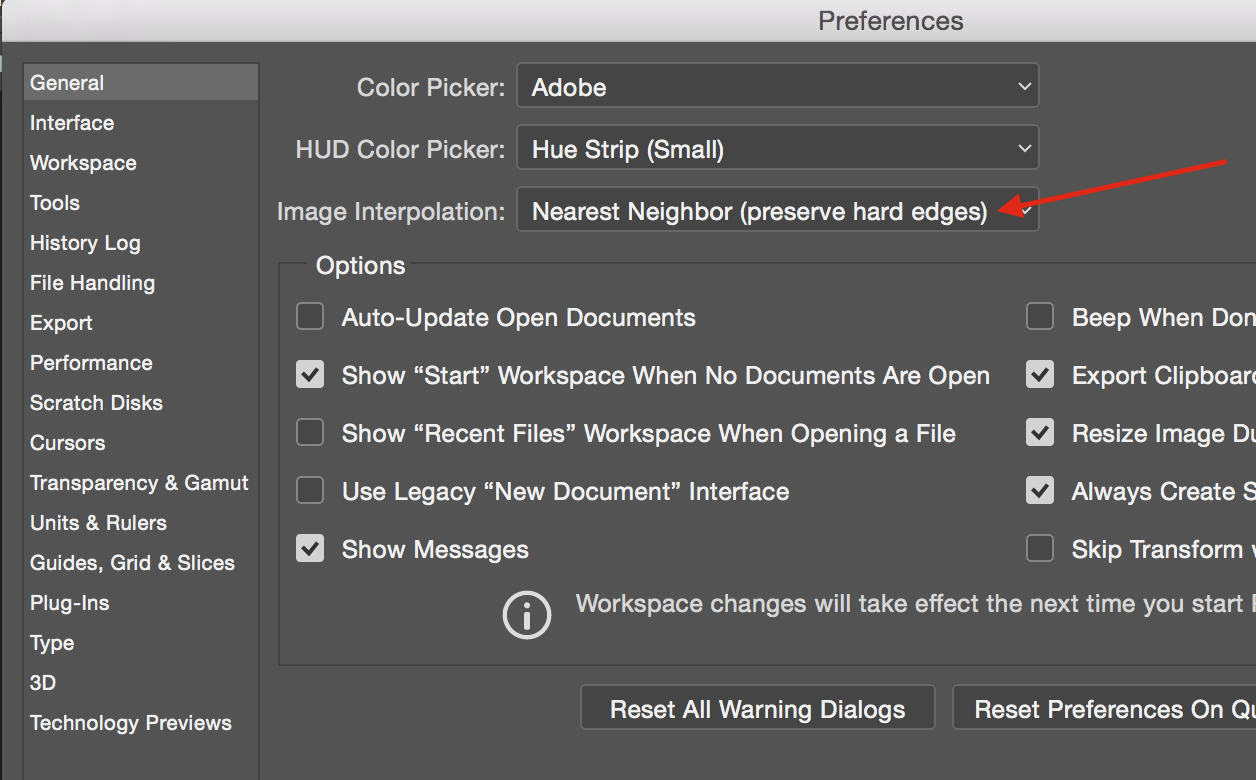
Step 2: Setup Image Interpolation to Nearest Neighbors
When your pixel art is resized or scaled, you’ll want the edges or corners to look hard and jagged instead of smooth and blurred. Be default, Photoshop uses Bicubic interpolation (or Bilinear) that produces a blurred effect when images are enlarged. While Bicubic interpolation works great for normal images, pixel art scaled using Bicubic look terrible and blurry as hell. As as example (source):
Here’s the old man from The Legend of Zelda who gives you the sword. (You may want to squint to see it)

Here he is scaled up 4x with Bicubic interpolation:

Scale here 4x using Nearest Neighbor:

See the difference? Here’s how to configure Photoshop to use the ‘Nearest Neighbor’ image interpolation algorithm.
Note: If you are exporting the image (‘Save for Web’ option) and resizing it, make sure that ‘Nearest neighbor’ is selected under ‘Quality’ or ‘Resample’.
Step 3: Set up the Tools
You’ll need to setup your drawing tools and get the desired pixelated effects. For pencil and eraser tools, here are the settings I used:
- size to 1 pixel (px).
- hardness to 100%.
- opacity to 100%.
- for the eraser tool, mode was set to ‘Pencil’.

The only other tool I used was the paint bucket which didn’t require any customization.
Step 4: Show the Grid (optional)
Grid is helpful in positioning and aligning things precisely. I find grid very useful when creating sprites. Grid can be enabled from the ‘View’ menu.

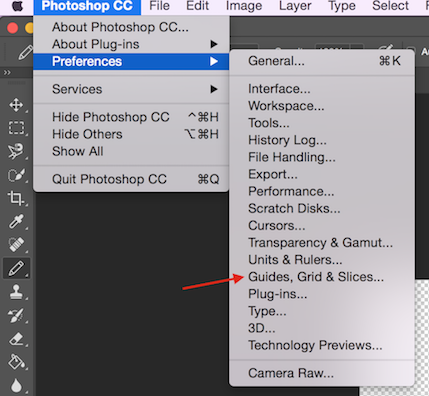
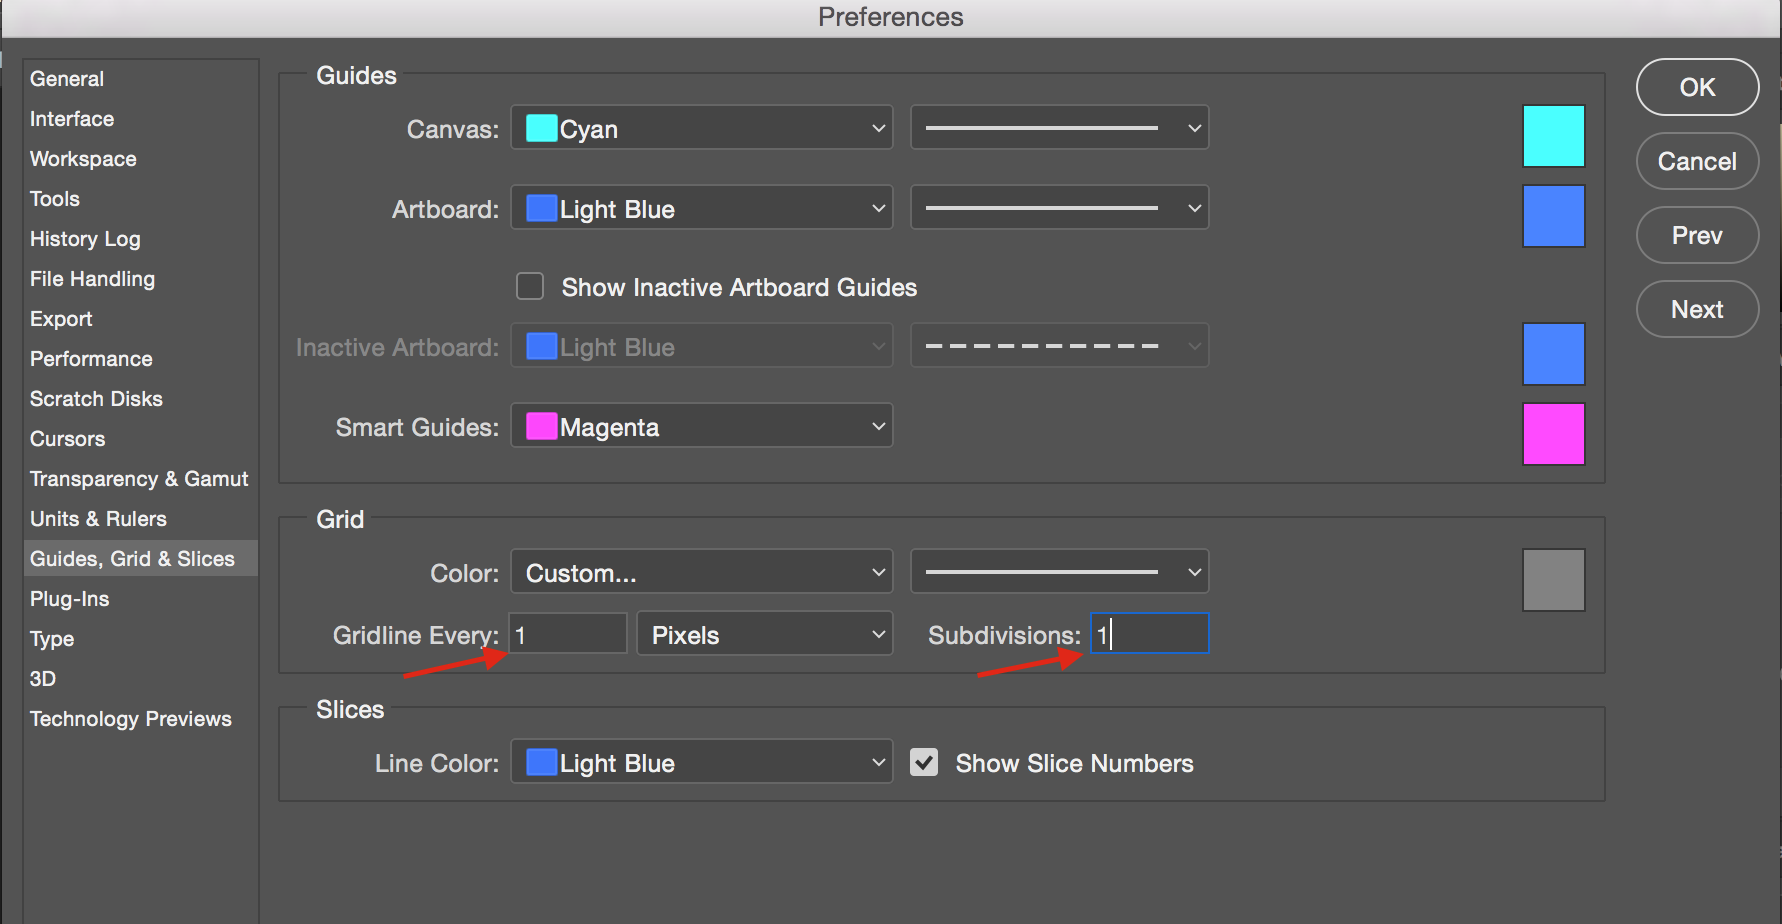
Next, we’ll need to adjust the grid so it can display each pixel individually. Open “Guides, Grids and Slices” settings from the Preferences menu and update the grid settings.
That’s all there is. I hope you found this tutorial helpful and that you go on to create magnificent pixel art :) To quote Bob Ross:
“People might look at you a bit funny, but it’s okay. Artists are allowed to be a bit different.”
Comments (6)
Rajib
umer mansoor thank you for your nice tutorial.He explain about configuring photoshop for 2D pixel art.He divided her lecture 4 step. if you want to configuring photoshop for 2D pixel art,you must go on in this 4 step.
Adriana
I know the post is old, but it’s still useful and one the first results on google, so it’s worth noting that you guys put the wrong image after “See the difference? Here’s how to configure Photoshop to use the ‘Nearest Neighbor’ image interpolation algorithm.”
Umer Mansoor
Hey great catch. It is fixed!
Karl
Great. But still, when i am importing other pixelart images, it’s blurred. Even with the Nearest Neighbor configured.
Raul
Do you mean a png image with a pixel art drawing?
Snarf
If you’re making a sprite for a video game, you’ll want to set your canvas to 16x16 or 32x32 instead of 20x20 for easier integration.